

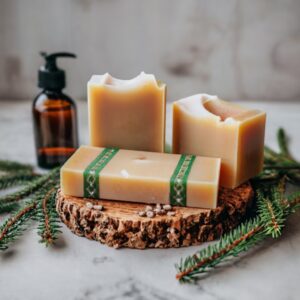
This aromatic pine soap offers an intense fragrance and provides a creamy lather for effective cleansing. The soap recipe embodies the essence of homemade soap, beginning with a melt-and-pour base enriched with pine oil and essential oils known for their skin-loving properties, resulting in a delightful natural forest scent.
pine soap benefits
The soap incorporates pine in various ways, including a moisturizing pine infusion and fragrant pine essential oil. Here are the potential skincare benefits offered by this soap:
- Soothing: Pine essential oil is reputed for its anti-inflammatory properties, which may provide relief for conditions like acne, eczema, and other inflammatory skin issues.
- Antioxidant: Pine exhibits remarkable antioxidant activity, helping to neutralize free radicals that can cause premature aging and wrinkles by attacking healthy skin cells and collagen.
- Antimicrobial: Studies suggest that pine needle oil acts as a natural antimicrobial agent, potentially reducing harmful bacteria on the skin.
- Wound Healing Support: Pine essential oil may aid in the healing of minor wounds, cuts, and abrasions, according to research.
- Relaxing: With analgesic properties, pine oil might help relax tired muscles and alleviate discomfort in achy joints.
- Christmas Tree Scent: The oil imparts a strong and uplifting aroma reminiscent of a fresh Christmas tree, adding a delightful sensory experience.
- Giftable: This melt-and-pour soap recipe yields a large batch, making it perfect for gift-giving during the holidays. The cost-effective materials allow for creating numerous homemade holiday gifts at a reasonable price.
pine soap recipe
Ingredients
Let’s talk about the natural soap ingredients! First, we’ll go over the essentials, and then we’ll cover the tools needed for this soap making project:
- Pine Essential Oil: Also known as Scots pine, it provides the forest-like scent. Ensure you choose a high-quality oil from a reputable essential oil company. The oil is mild and suitable for all skin types, including children.
- Pine-Infused Oil (Optional): A simple pine oil created by infusing carrier oil (e.g., jojoba oil) with foraged pine needles. You can use any carrier oil or omit this step.
- Soap Base: Any soap base works, such as goat’s milk, olive oil, or glycerin. The soap in the photos used a shea butter melt-and-pour soap.
- Green Spirulina Powder: This algae powder imparts a natural green color to the soap. Spirulina is rich in essential amino acids and nutrients, making it a beneficial addition to skincare.
- Light Green Mica (Optional): A tiny amount brushed across the top adds an exquisite shimmer effect to the soap bars.
- High-Proof Alcohol (Optional): Helps dissolve bubbles, dilute spirulina powder, and adhere soap layers together. Use rubbing alcohol, ethanol, or 190-proof Everclear.
Tools
- Soap Mold: A large, 42-oz / 1200 ml mold with a flexible silicone inlay and a sturdy wooden box. It yields 12 to 13 soap bars.
- Fondant Texture Mat (Optional): Imparts an interesting tree bark texture into the soap.
- Soap Cutter (Optional): For cutting individual soap bars. Alternatively, a large kitchen knife can be used, but a soap cutter ensures evenly sized bars.
- Digital Scale: To measure ingredients accurately.
- Cutting Board and Paring Knife: For chopping up the soap.
- Large Measuring Cup: To melt the soap base.
- Metal Spoon: For combining ingredients and pouring the soap.
- Fine Mister Spray Bottle: To disperse the high-proof alcohol.
- Soft, Flat Brush: For applying the mica powder.
- Scissors: To trim the texture mat.
- Mason Jar: For infusing the pine oil.
How to make pine oil
- Prepare Pine Needles: Place fresh or dried pine needles into a 4-oz / 115 ml mason jar, using approximately 1/8 cup of needles.
- Add Carrier Oil: Fill the jar with 1/4 cup of carrier oil. Jojoba oil or any other carrier oil of your choice works well.
- Create a Double Boiler: Place the jar in a small saucepan filled with water (1/2 in / 1 cm).
- Simmer: Bring the water to a mild simmer. Let it infuse for 20 minutes, checking regularly and adding more water if needed.
- Strain the Oil: After 20 minutes, strain the pine oil through a fine-mesh sieve, discarding the needles.
- Variety: You can also prepare infused oil using needles from other conifer trees like spruce, fir, or juniper.
Pine soap scents
| Blend Name | Essential Oils |
|---|---|
| Evergreen Bliss | Pine, Cedarwood, Fir |
| Winter Woods | Pine, Spruce, Eucalyptus |
| Forest Harmony | Pine, Cypress, Juniper |
| Woodland Serenity | Pine, Frankincense, Patchouli |
| Frosty Pine | Pine, Peppermint, Lavender |
| Balsam Breeze | Pine, Balsam Fir, Orange |
| Holiday Cheer | Pine, Cinnamon, Clove |
| Fresh Pine Citrus | Pine, Grapefruit, Bergamot |
Adjust the number of drops based on your preference and the size of your soap batch.
How to make pine soap
Step 1: Cut Texture Mat
- Cut pieces from a silicone texture mat to fit the soap mold.
- Bevel the edges to fit the mold better.
Step 2: Prep Soap Mold
- Place the trimmed texture pieces into the mold, ensuring they’re well-fitted.
Step 3: Create and Pour White Layer
- Chop and melt 14 oz of soap base.
- Add pine-infused oil and pine essential oil.
- Pour into the mold and chill for 1 hour.
Step 4: Dilute Spirulina Powder
- Mix 1/2 tsp spirulina powder with 1 tbsp high-proof alcohol in a jar. Set aside.
Step 5: Create Green Layer
- Cut and melt 28.2 oz of soap base.
- Add pine-infused oil, pine essential oil, and the diluted spirulina mixture.
- Pour into the mold and chill for 3 to 4 hours or overnight.
Step 6: Unmold Soap
- Remove the silicone mold from the wood box.
- Pull the mold from the soap to break the airlock.
- Lift the silicone to release the soap.
Step 7: Dust with Mica (Optional)
- Dust the textured top with green mica using a soft brush.
- Shake off excess mica.
Step 8: Cut Soap Bars
- Use a soap cutter to cut the block into individual soap bars.
- Adjust the cutter for desired thickness (e.g., 0.8 in / 2 cm).
Tips for success
- Additional Tips:
- Measure Your Soap Mold:
- Measure your soap mold before cutting the texture mat to ensure a precise fit.
- Use a digital scale for accurate measurements as melt-and-pour soap can be challenging to measure in cups.
- Protect Your Hands:
- Melted melt-and-pour soap can get hot, so wear oven mitts to protect your hands when handling it.
- Spray with Alcohol:
- Spray the white soap layer with alcohol to enhance the adhesion between the layers.
- Cool Green Soap:
- Let the green soap cool to 135°F / 55°C before pouring it over the white layer.
- Avoid pouring soap that is too hot, as it could melt into the white layer.
- Remove any skin that forms on the soap with a spoon.
- Pouring Technique:
- Pour the green soap over a spoon to control the flow and prevent disruption to the white layer.
- These tips will help ensure precision and a smooth process when making the pine soap.
Storage instructions
- Packaging: Melt and pour soap is prone to absorbing moisture from the surroundings. If living in an area with high humidity, be sure to wrap each pine soap bar tightly in plastic wrap/cling film to prevent this effect.
- Storage: Store your pine tree soap in a cool, dark location where it isn’t exposed to sunlight, for example, a lidded box or a cabinet.
- Shel life: Pine oil soap will keep well for at least 1 year.
FAQ’s
1. How long does it take for pine tar soap to cure?
Curing time for pine tar soap can vary, but it typically ranges from 4 to 6 weeks. During this period, the soap hardens and its moisture content decreases, resulting in a milder and longer-lasting bar. Patience is key to allowing the soap to fully cure for optimal performance.
2. How can I make my house smell like pine naturally?
To naturally infuse your home with the scent of pine, you can try the following:
- Use pine-scented essential oils in a diffuser.
- Place pine needles or pine cones in decorative bowls.
- Simmer a pot of water with pine needles, cinnamon sticks, and citrus peels on the stove.
These methods provide a fresh and invigorating pine fragrance throughout your living space.
3. Does pine tar soap repel bugs?
Pine tar soap is known for its potential insect-repelling properties. The scent of pine is believed to deter certain bugs. While it may not be as effective as specialized bug repellents, some people find that using pine tar soap can contribute to a more bug-resistant experience, especially when spending time outdoors.
Can I use another conifer essential oil?
Absolutely! You have the flexibility to substitute Scotch pine with any other conifer essential oil that suits your preference or availability. Options like fir needle, Balsam fir, Douglas fir, black spruce, and cedarwood can be excellent alternatives to pine, providing diverse aromatic profiles.
Do you need fresh or dry pine needles for the oil infusion?
You can create pine oil infusion using both fresh and dried pine needles. If using fresh pine needles, ensure they are clean and free of moisture. For dried pine needles, simply spread them out on a baking sheet and allow them to dry for 2 to 3 weeks. The goal is to use needles that appear dry and have a faded color.